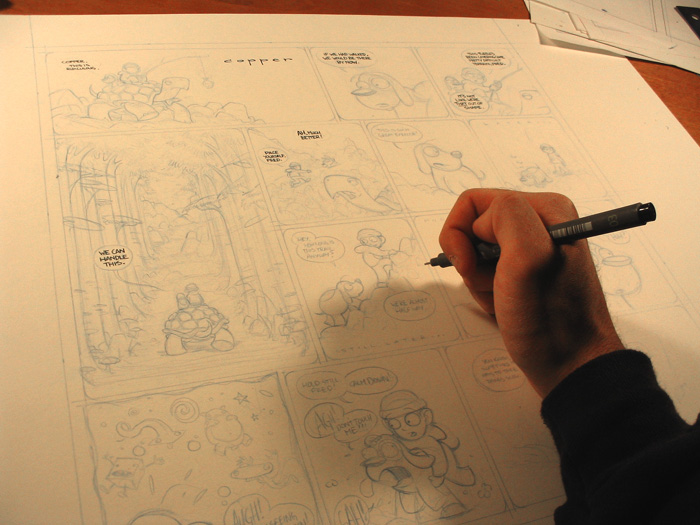
After finishing up the pencils, tightening up the dialogue and any difficult-to-manage shapes (fine details) with the pencil, I use a 03 Staedtler Pigment Liner pen to letter the comic. Microns are also a good choice, although they tend to rub off a bit when erasing over the lines.

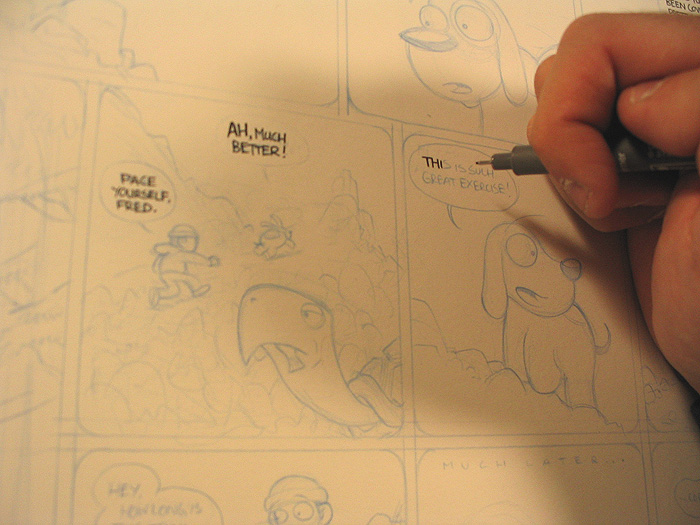
I prefer to hand letter my pages because I like to have control over each image's composition in the drawing stage. Since dialogue takes up so much room in a panel, I treat the letters like images. I also like it for the more organic control over the volume and flow of the characters' dialogue. Aside from their expressions, it's a major indicator of their "acting", so I try to liven up any scene with fun text whenever I can. I only use a digital font (made from my handwriting) when I have to write out very long descriptions, like the Texas Hold 'Em explanation sequence in Daisy Kutter.


After the lettering is finished, I move on to the panel borders. For this, I use the Alvin Penstix .7 mm marker pen. When I first saw these, I was surprised to find a cheap marker that claimed to dispense India ink. Nowadays, it just says that the marker is of "India Ink quality", whatever that means. In any case, I still use it for panel borders, despite the slightly reddish tint of the ink. It's just the right thickness and I don't mind burning through a bunch of these, as the ends get frayed on the ruler edge. I just freehand the rounded corners.
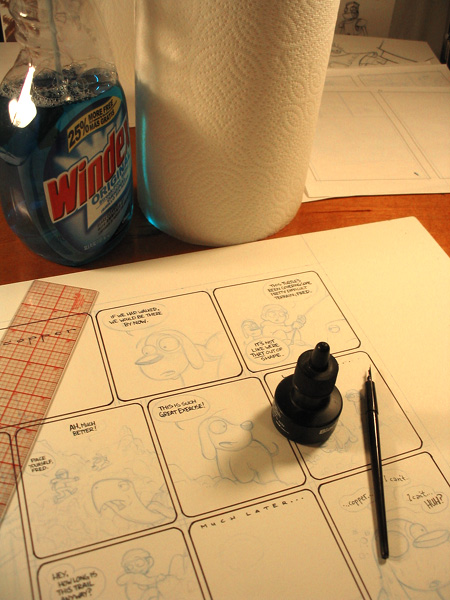
The trusty old Hunt no. 102 Crow Quill nib pen. If there is a pen out there with better natural line variation, I have yet to see it. The ink is Higgins Black Magic India Ink by Sanford. New bottles tend to have ink that's a little too watery for my taste, so I usually either let the bottle sit open overnight to dry the ink a bit, or I dump the contents of my previous bottle into the new one and shake it. The paper towels and Windex are standing by, ready to clean the pen. In the process of inking, I generally wipe the nib clean with a dry towel, but I clean the nib with Windex after finishing the piece.

I began using the crow quill in middle school, when a guy at the local art store told me he was Rob Liefeld's friend, and that Liefeld used these babies to ink his pages. I was sold, and I began practicing with these things every day. It took me a long while to realize that you're supposed to ink with the spoon facing the paper, the ink suspended beneath it. Anyway, thanks to Liefeld and his buddy at the art store, Copper has nice line variation on his hoodie. Here, I was beginning to notice that this sheet of paper tended to bleed a little bit, so I wasn't able to get super clean lines this time around.

I make my way down the page from left to right, not necessarily in order, but in a way I can avoid running my drawing hand over the ink. Using the dip pen also means that the ink dries very slowly. Only a few years ago, this page would have been covered in process white to patch up all the smears left by my hand.

The finished inked page. Make sure to clean the nib using water or Windex before placing it on the page like this in order to take a really cool photo.
Onward to part 3: COMPUTER MADNESS!or go back to: